How to Set Up a Cricut
Setting up the machine takes about twenty minutes. Setting it up so your first project works takes about an hour. Here is the difference.
Heads up: Mat & Blade earns a commission from qualifying purchases made through the links on this page, at no extra cost to you. It never changes which products we recommend or how we rank them. Read the full disclosure.
Plan about an hour from sealed box to finished first project. The machine itself takes roughly twenty minutes: unbox, plug in, install Design Space, create an account, pair over Bluetooth or USB, apply the firmware update and run the practice cut that ships in the box. The other forty minutes are the parts that decide whether the first project works — checking you have the right mat, the right material and weeding tools, and making one deliberate test cut before you cut anything you care about.
The ten steps
11. Unbox and check the accessory pack
Machine, power supply, USB cable, one mat, a blade already fitted in its housing, and a practice project. Keep the box for a week — if the machine is faulty, a return is far easier with it.
22. Put it somewhere with clearance front and back
The mat feeds through and out the back, so the machine needs roughly its own depth again behind it. Pushing a machine against a wall is the most common cause of a mat jamming on a first cut.
33. Install Design Space and make an account
Download it from Cricut's own site for desktop, or the app store on a tablet or phone. An account is required; a paid Cricut Access subscription is not. Design Space is free and will cut your own images and SVG files.
44. Pair the machine
Bluetooth or the supplied USB cable. USB is worth using for the first setup even if you plan to work wirelessly — it removes one variable from the firmware update.
55. Apply the firmware update
Design Space will prompt. Do it before anything else and do not interrupt it. A machine behaving oddly out of the box is very often a machine that has not updated.
66. Run the practice project
The included project and material exist to confirm the machine, the mat, the blade and the software are all talking to each other. It takes two minutes and it tells you whether a later problem is your design or your hardware.
77. Check your mat against your material
Standard grip (green) for vinyl, iron-on and cardstock. Light grip (blue) for thin paper that would tear. Strong grip (purple) for thick card, chipboard and glitter material. Using the wrong grip is misread as a blade problem more often than anything else.
88. Make one deliberate test cut
A one-inch square of the actual material you are about to use, at the named preset for that material. Check the cut released cleanly and did not go through the backing. One square of vinyl is cheaper than one ruined 12 inch sheet.
99. Cut something simple and bold
A chunky word or a solid shape, not thin script. Weeding a thin-stroke design as your first ever weed is how people decide they hate this hobby in the first evening.
1010. Apply it
For a decal: transfer tape, a straight reference line, and burnish it down. For a shirt: heat transfer vinyl at the published temperature and time with real pressure. A household iron is where most first shirts go wrong.
The three steps people skip
The firmware update. Skipping it produces exactly the symptoms people blame on a faulty machine: failed Bluetooth, stalled cuts, the carriage behaving unpredictably. It takes two minutes. If Design Space is misbehaving generally rather than at setup, when Design Space is not working covers the wider troubleshooting.
The test cut. A one-inch square at the material's preset answers the only question that matters — did the blade get through the material and not through the backing — before you commit a full sheet. Every experienced user does this and almost no beginner does.
Rolling the material flat onto the mat. Material that lifts mid-cut tears, and the tear gets blamed on the blade. Press it down firmly with your hand, or use a brayer. On a new mat this matters less; by the fifth project it matters a lot. The Cricut mat guide covers mat care and when tack is genuinely gone, and when a mat is not sticky covers restoring it.
What to have ready before you start
| Item | Needed for | In the box? |
|---|---|---|
| Cutting mat, standard grip | Vinyl, iron-on, cardstock | One mat, usually standard grip |
| Fine-point blade | Everyday cutting | Yes, already in the housing |
| Adhesive vinyl | Decals on hard surfaces | No |
| Heat transfer vinyl | Designs on fabric | No |
| Weeding tools | Removing waste vinyl from a design | No |
| Transfer tape | Moving an adhesive decal in one piece | No |
| A heat source that holds a temperature | Any HTV project | No |
| Scraper and spatula | Clearing the mat, lifting cuts | Sometimes in bundles |
1. Best for the machine this walkthrough assumes
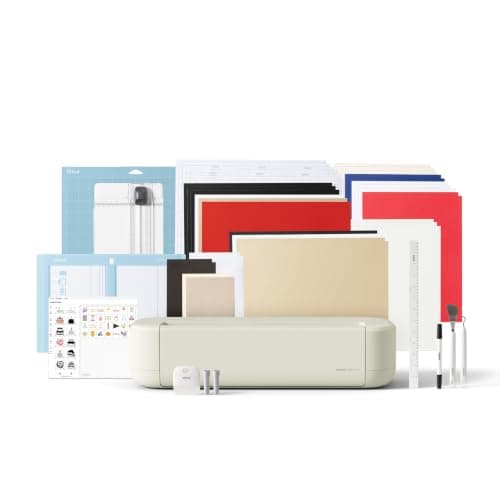
Cricut Explore 5
Cricut · Currently sold · Verified 2026-09-27
The setup steps below are the same across the current line, and the Explore 5 is the machine most people are unboxing: 12 inch material, two tool slots so it can cut and draw in one pass, matless cutting with Smart Materials, and named material presets in Design Space for vinyl, heat transfer vinyl, cardstock, paper and iron-on. The Joy 2, Joy Xtra, Maker 5 and Venture all set up the same way — the only differences are mat sizes and which tools the carriage accepts.
What works
- Cuts every material a beginner's first ten projects will use
- Matless Smart Material cutting means long banners and decals without a mat
- Cheapest current machine that still handles full 12 in wide vinyl
- Huge community of tutorials aimed at exactly this machine
What does not
- No rotary blade, so unbacked fabric is out
- No knife blade for basswood or thick leather
- Still needs Design Space, which needs an internet connection to set up
Not for you if
You already know you want to cut quilting fabric or thick leather. That is the Maker line's rotary and knife blades, and no accessory adds them to an Explore.
Key specs
- Cuts
- Vinyl, heat transfer vinyl, cardstock, paper, iron-on, faux leather
- Max material width
- 12 in (11.5 in cut width)
- Matless cutting
- Yes, with Smart Materials
- Tool slots
- Two — blade plus pen or scoring tool
- Rotary / knife blade
- No — Maker line only
Price as of November 12, 2026
#ad · affiliate link · we never show a price we cannot verify
2. Best for the thing most likely to be wrong on day one
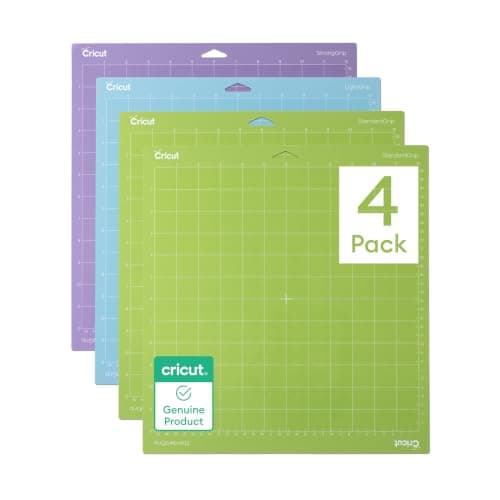
Cricut Cutting Mat Variety Pack
Cricut · Currently sold · Verified 2026-09-27
A new machine comes with one mat, and it is usually the standard-grip green one. That is correct for vinyl, iron-on and cardstock, and wrong for thin paper (which tears on it) and for thick cardstock or glitter material (which shifts on it). A variety pack covers light, standard and strong grip so the first time you cut something unexpected you are not blaming the machine for a mat problem. Mats are consumables — tack declines with use and is partly restorable.
What works
- Correct grip prevents both torn material and material sliding mid-cut
- Third-party mats cost noticeably less than brand mats
- Tack can be partly restored with gentle washing
What does not
- They wear out, and a tired mat causes cuts people blame on the machine
- Strong grip can shred thin paper
Not for you if
You only ever cut Smart Materials matless. Even then, keep one standard mat for the day you buy ordinary vinyl.
Key specs
- Grip levels
- Light, standard, strong, and fabric-specific
- Standard grip
- Vinyl, iron-on, cardstock — the everyday mat
- Strong grip
- Thick cardstock, chipboard, glitter materials
- Light grip
- Thin paper and vellum that would tear on a standard mat
- Lifespan
- Consumable — tack declines with use and is partly restorable
Price as of November 12, 2026
#ad · affiliate link · we never show a price we cannot verify
3. Best for what you need within thirty minutes of the first cut
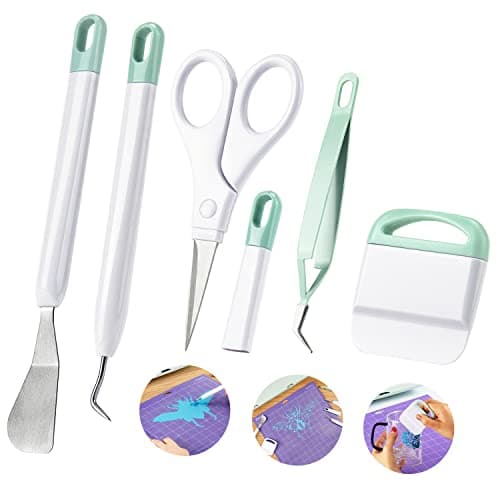
Ecraft Vinyl Weeding Tool Set
ecraft · Currently sold · Verified 2026-09-27
The practice cut will come out fine and the first real design will need weeding, which is picking the waste vinyl out from inside letters. Fingernails do not work and a craft knife tears the design. A set with a weeding hook, fine tweezers, a scraper and a spatula is the cheapest purchase in this hobby and the one that changes the first evening most. Nothing in a set like this is brand-specific.
What works
- Turns the most tedious step into a manageable one
- The scraper doubles as your transfer-tape burnishing tool
- Cheap, and a set lasts years
What does not
- Cheap sets have soft points that dull quickly
- More pieces than you will actually use
Not for you if
Nothing — if you cut vinyl, you need at least a hook.
Key specs
- Typical set
- Weeding hook, fine tweezers, scraper, spatula, scissors
- Used for
- Removing the vinyl you did not cut out of the design
- Also fits
- Every brand of machine — nothing here is Cricut-specific
Price as of November 12, 2026
#ad · affiliate link · we never show a price we cannot verify
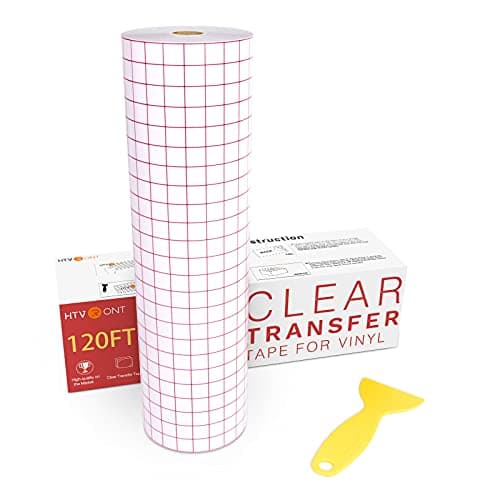
4. Best for getting the first decal off its backing in one piece
HTVRONT Transfer Tape for Vinyl
HTVRONT · Currently sold · Verified 2026-09-27
This is the step that catches people out: a weeded adhesive-vinyl decal cannot be picked up letter by letter. Transfer tape lifts the whole design off its backing and places it as one piece. Medium tack suits most craft vinyl, gridded versions make alignment far easier, and a sheet can usually be reused several times. If your first project is a decal rather than a shirt, you need this on day one and will not have it unless you bought it.
What works
- Turns an impossible alignment job into a single motion
- Gridded versions make straight application genuinely easy
- Cheap relative to how much frustration it removes
What does not
- High-tack tape can pull thin vinyl off its backing and tear it
- Not used for heat transfer vinyl, which has its own carrier sheet
Not for you if
You are only making shirts. HTV comes with its own carrier and needs no transfer tape.
Key specs
- Purpose
- Lifts a weeded decal off its backing and places it as one piece
- Tack
- Medium tack suits most craft vinyl
- Format
- Rolls, usually 12 in wide; gridded versions help alignment
- Reusable
- A sheet can usually be reused several times
Price as of November 12, 2026
#ad · affiliate link · we never show a price we cannot verify
Setting up the different models
The process above is the same for every current machine. The differences are small: the Joy 2 and Joy Xtra use their own narrower mats, so a 12 inch mat will not fit them. The Maker 5 accepts the rotary and knife blades, each of which is a separate housing you swap in rather than a setting. The Venture is large enough that step two — clearance front and back — becomes a furniture decision rather than a note.
If you have not bought yet and this list is making you reconsider the model, which Cricut should I buy is the decision guide and the best Cricut machine 2026 ranks the current line. If you are still deciding whether the hobby is for you, is a Cricut easy to use is an honest read on the learning curve.
Your first project
Pick a decal or a shirt and do only that. A decal needs adhesive vinyl, weeding tools and transfer tape; a shirt needs heat transfer vinyl and a press. Doing both on the first evening means learning two application techniques at once and blaming the machine for whichever goes wrong. Your first vinyl decal and your first Cricut shirt are the two step-by-step walkthroughs, and what you need to start is the full shopping list.
Common questions
How do you set up a new Cricut machine?
How long does it take to set up a Cricut?
Do you need a subscription to set up a Cricut?
What comes in the box with a Cricut?
Can you set up a Cricut without a computer?
Why is my new Cricut not connecting?
Sources
- Google Autocomplete — 'how to choose a cricut' — Live completions included 'how to set up a cricut machine', 'how to set up a cricut' and several per-model variants - checked 17 October 2026
- Cricut machine setup — manufacturer documentation — Manufacturer setup sequence, Design Space account requirement and firmware update guidance - checked 17 October 2026
- Cricut cutting mats — manufacturer guidance — Grip levels by material: light, standard, strong and fabric mats - checked 17 October 2026
How we picked
We verify every product is currently sold by reading the manufacturer's own catalog, compare published specifications rather than marketing copy, and rank on what a first-time buyer has to decide. We do not run lab tests and we do not claim to, and commission never affects the order.
Read this next
What You Need to Start
The genuine beginner checklist — what you need for a first project and what can wait.
Cricut Design Space Basics
The six Design Space functions that cover almost everything, and what each one actually does.
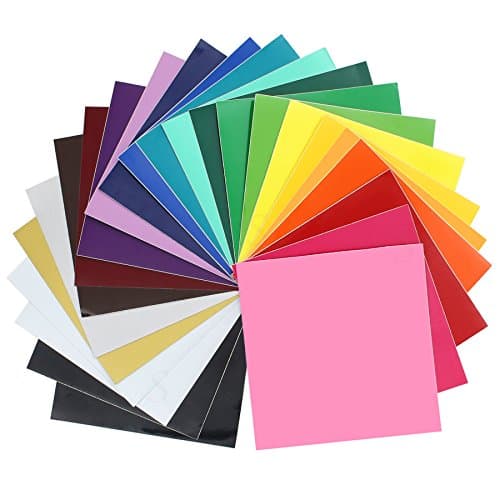
Your First Vinyl Decal
The cheapest first project — a complete decal walkthrough with no heat source required.

Your First Cricut Shirt
A complete first-shirt walkthrough, with the three common mistakes flagged before you make them.
The Cricut Accessories You Actually Need
The short list that genuinely earns its space, the longer list that does not, and the buying order.
Is a Cricut Easy to Use?
Where the Cricut learning curve actually is — software, material settings and weeding — and what makes the first week easier or harder.
Back to Start Here.